Before we jump into the installation & setup configuration, lets understand the basics of SonarQube.
What is SonarQube?
SonarQube is an open-source platform developed by SonarSource for continuous inspection of code quality and conduct static analysis of code to identify bugs, code smells & security vulnerabilities on 20+ programming languages.
SonarQube produces report for the below
- Duplicate code (code smells)
- Coding Standards
- Unit Tests
- Code Coverage
- Code Complexity
- Comments
- Bugs
- Security Vulnerability
It enforces quality policy in the organisation to find out whether the code is ready for release by showing the quality gate as ‘PASSED’ or ‘FAILED’. We can define our own quality rules and each rule is combination of ‘Measure’, ‘Comparison Operator’, ‘Error Value’. It raises bug with the severity as ‘Blocker’ ,’Critical’ ,’High’ ,’Medium’ ,’Low’
Example of quality gate rules – ‘No new blocker issues’, ‘Code coverage on new code >80%’ etc.
In terms of report it produces, pretty much everything is self-explanatory but let’s look at the security area where it produces vulnerability & security hotspot. Difference between both is
- Hotspot: Security -sensitive piece of code is highlighted, but overall application security may not be impacted. Developer needs to review whether code needs to be changed or not.
- Vulnerability: Problem that impacts the application security which needs to be fixed immediately.
Sonar uses various code analysis tools such as CheckStyle, PMD, FindBugs, FxCop etc.
Installation & Setup of SonarQube to scan & run locally (Windows 11):
We need two components to be installed locally – SonarQube & SonarScanner.
Step 1:
Download the latest version of SonarQube & SonarScanner from sonarqube website and unzip the files to directory path you specify for both
https://www.sonarqube.org/downloads/
https://docs.sonarqube.org/latest/analyzing-source-code/scanners/sonarscanner/
Step 2:
Install Java JDK version 11 or above for sonarqube to run
https://www.oracle.com/in/java/technologies/downloads/
Step 3:
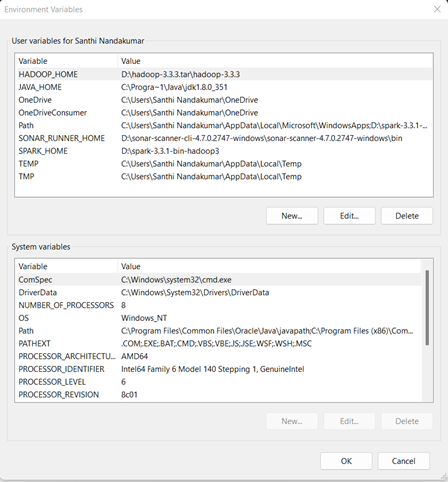
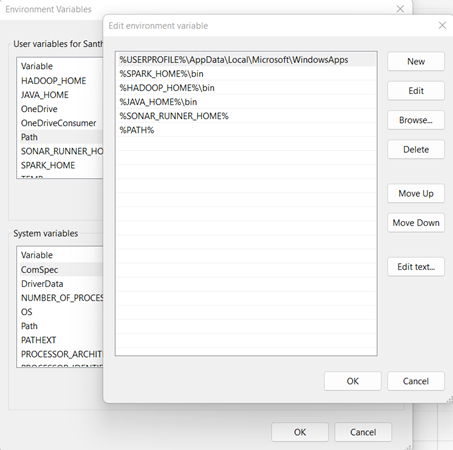
Setup environment variables and include in PATH
Step 4:
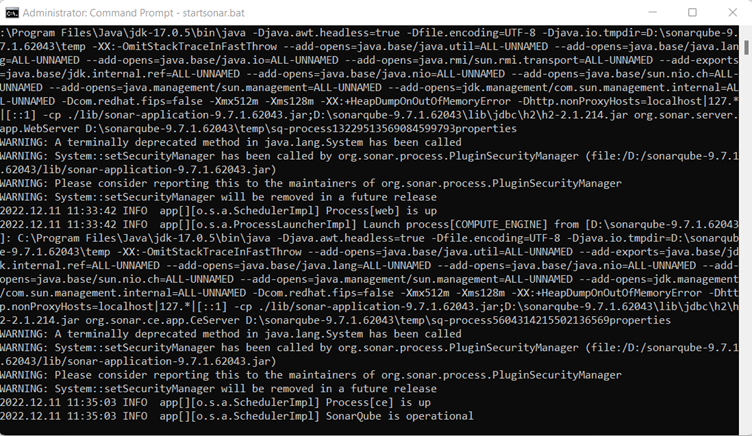
Start the sonarqube to run locally with command ‘startsonar.bat’
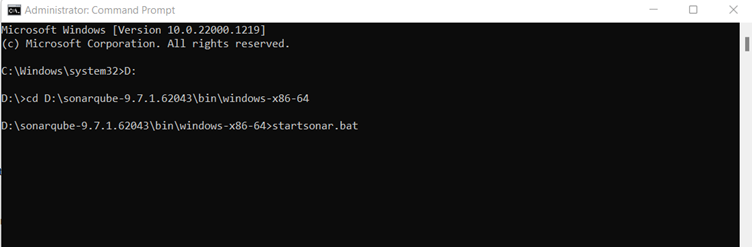
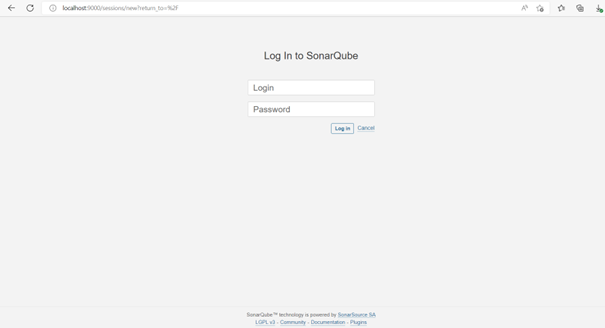
It can be accessed via URL : https://localhost:9000
It will show up login page and default uid/pwd is admin/admin.
Step 5:
Run sonarscan for the project application. Before running the scan , we need to choose manual option to create project under ‘Projects’ menu . lets ensure the unique name is given for project-key . Once its complete,token will be generated & copy that as it will be used in scan command. Lets go to project root folder and create sonar-project.properties ( given sample below)

Step 6 :
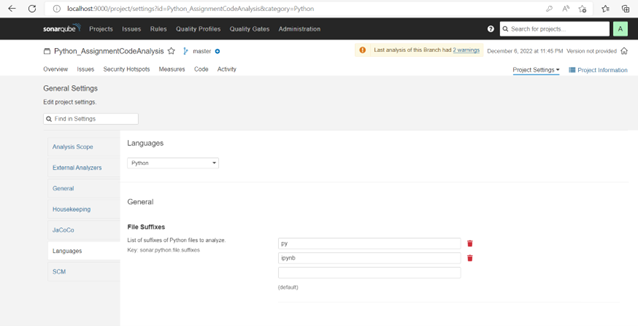
Go to sonarqube url and open the project created. I have used python code in my local to do sonar scan so under project settings -> Language -> Choose ‘Python’ and configure the file extension to be scanned in ‘File Suffixes’
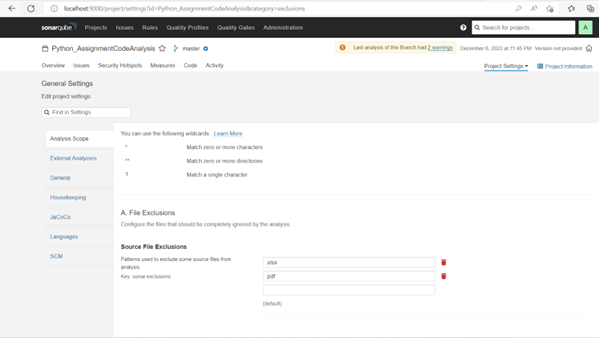
Exclude the files that needs to be removed from scanning under Project Settings -> General-> Source File Exclusions
Step 7:
All configurations are complete. Lets do the scan in command prompt and run the below command under project root folder
sonar-scanner.bat -D”sonar.projectKey=Python_AssignmentCodeAnalysis” -D”sonar.sources=D:\DataProjects\DataProjects\DataMining_AttritionAnalysis\AttritionAnalysis.ipynb” -D”sonar.host.url=http://localhost:9000″ -D”sonar.login=<sonar-token-here>
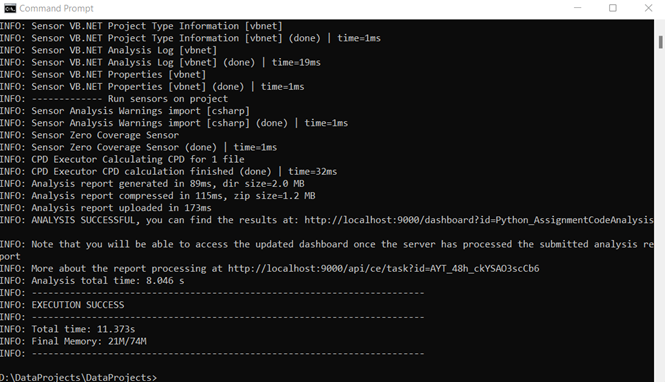
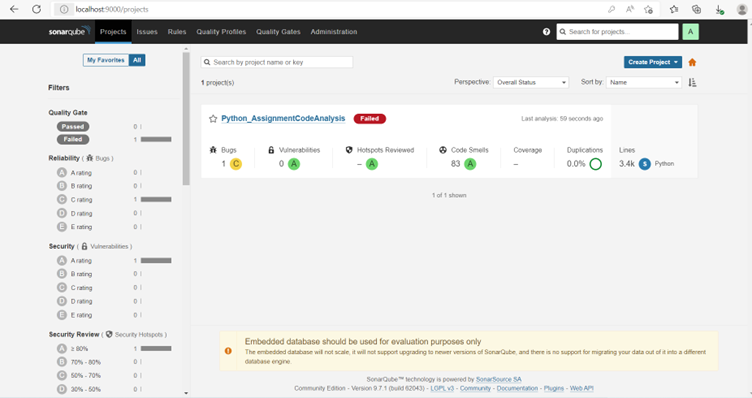
Post running the command, access the project folder and you will be able to see the quality metrics in the dashboard like below
This concludes the installation and setup for sonarqube locally in Windows 11. Hope the article was helpful to gain knowledge.