In this article, we will look at Jenkins integration with SonarQube. Let’s look at the steps below
Outcome expected is that when changes are made in code & gets committed, then Jenkins build will automatically do the build with Sonar scan analysis.
Step 1:
Install required prerequisites
- Install Jenkins & configure maven job
- Install Java JDK
- Install Apache maven
- Install SonarQube
- Assuming in GitHub Sample code is available
Step 2:
Install Sonar Scanner plugin
Under Manage Jenkins -> Manage Plugins and search for Sonar Scanner to install
Use Download and install option directly rather than using CLI tool ( ex. Jenkins-plugin-cli –plugins sonar:<version> )& direct upload option.
Step 3:
Get token to Configure Sonar in Jenkins
In SonarQube UI, under Projects which we want to scan, generate token and copy it.
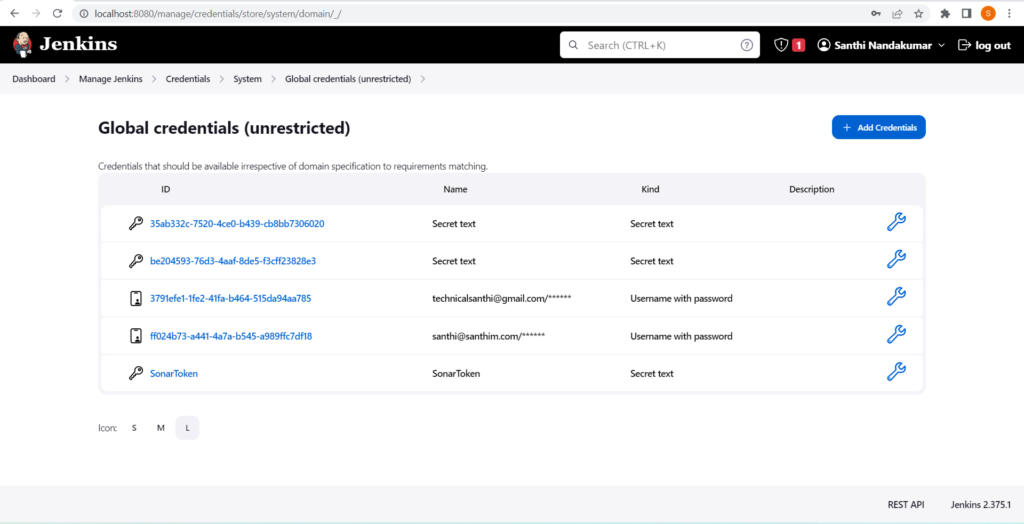
In Jenkins , under Dashboard -> Manage Jenkins -> Credentials-> System -> Global Credentials
Click on Add credentials and copy the token generated as ‘Secret text’ and give name . In this example, I had given name as ‘SonarToken’
Step 4:
Configure Sonar in Jenkins
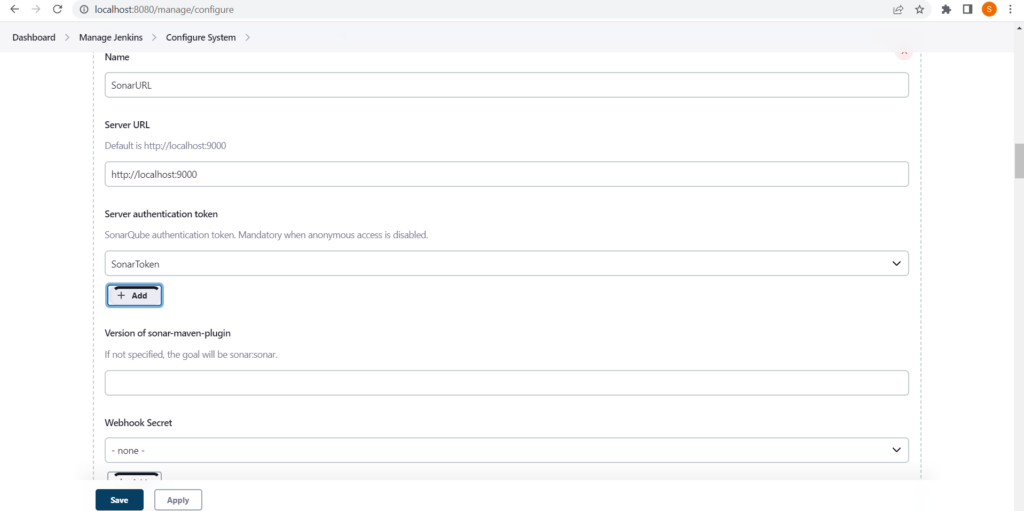
In Jenkins, under Dashboard -> Manage Jenkins -> Configure System
Include Sonar URL & sonar token generated
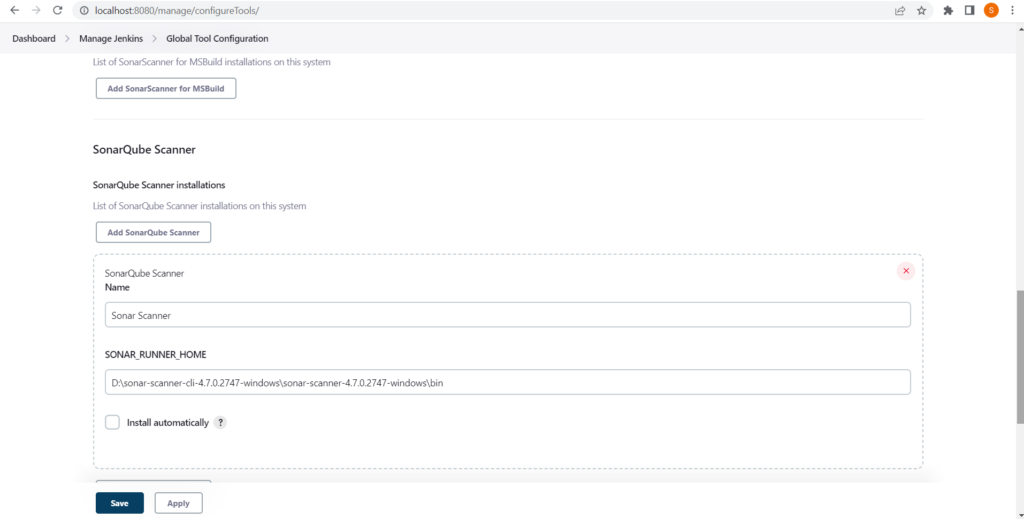
under Dashboard -> Manage Jenkins -> Global Tool Configuration
Include path of sonar scanner where it is installed and save it.
Step 5:
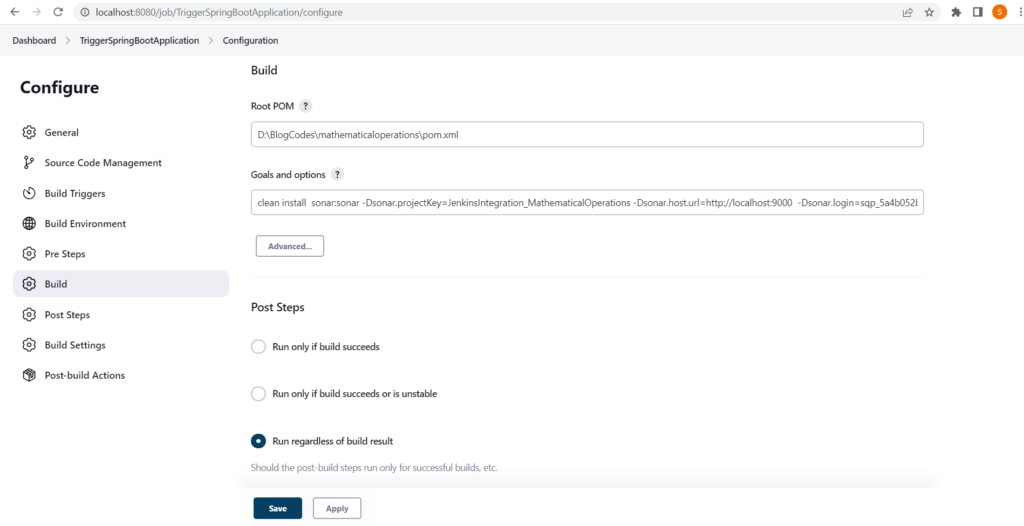
Configure in Jenkins Job
Update goals and options with command to run the sonar
clean install sonar:sonar -Dsonar.projectKey=JenkinsIntegration_MathematicalOperations -Dsonar.host.url=http://localhost:9000 -Dsonar.login=<token here>
Step 6:
Verify whether sonar scan runs post commit in GIT
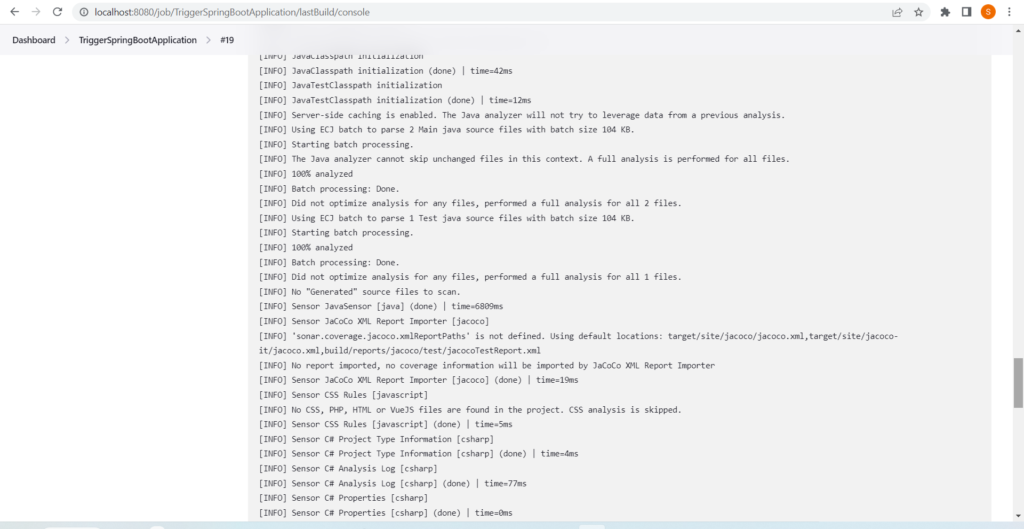
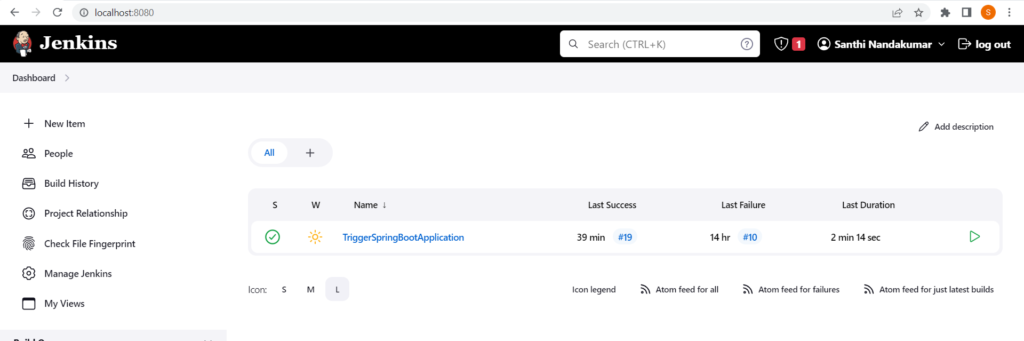
Commit code changes in GitHub and monitor Jenkins UI. Success of SonarQube run can be checked through ‘Console logs’ as well as in the SonarQube UI.
We could see that build with sonar run is done successfully from the screenshots below.

Hope this article will be helpful.